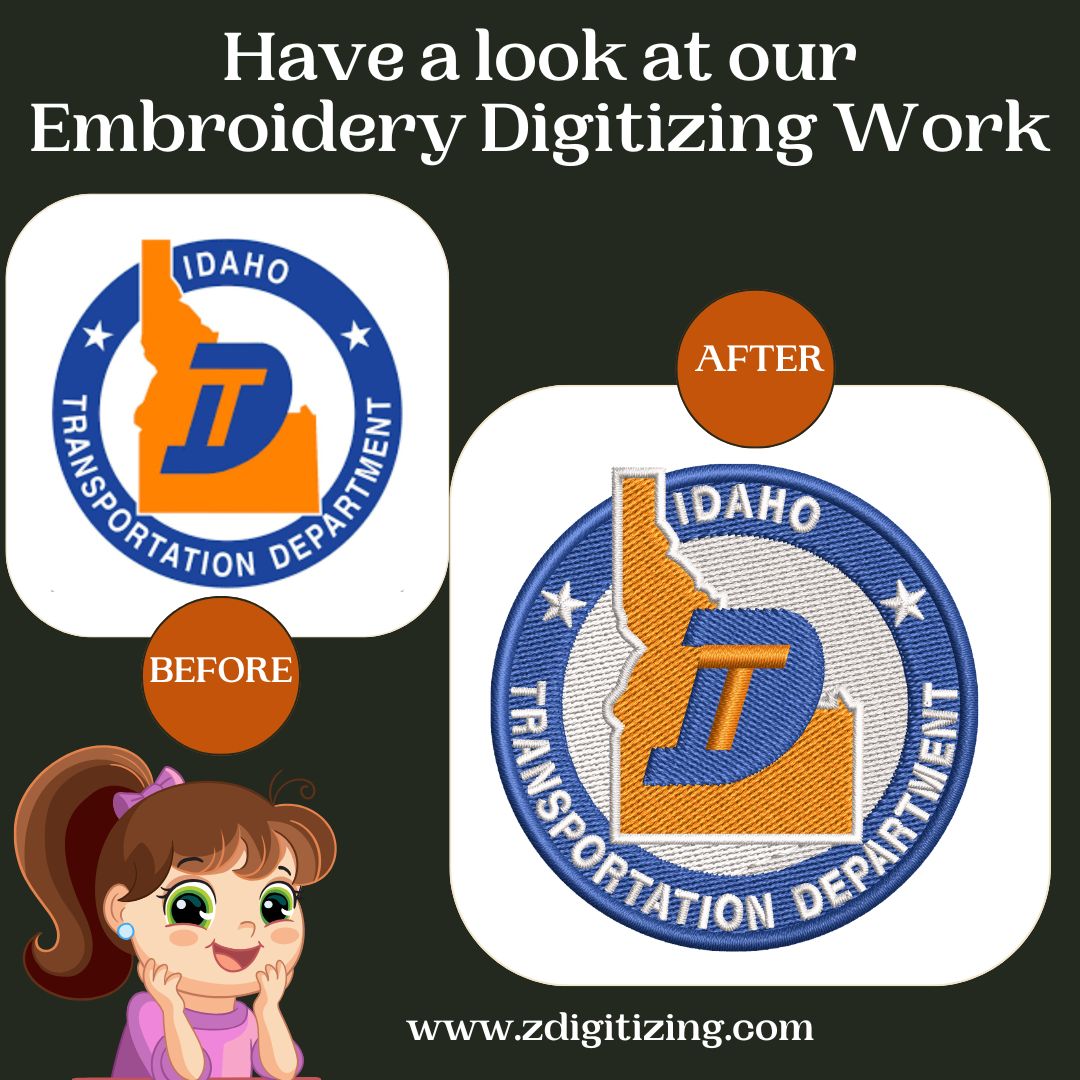
In the world of textile art and commercial garment production, machine embroidery digitizing has emerged as a game-changing innovation. This specialized process bridges the gap between digital design and needle-and-thread execution, allowing artists and businesses to create precise, professional embroidery with speed and consistency.
Whether you’re a small business owner, a fashion designer, or a hobbyist looking to elevate your craft, understanding the basics of embroidery digitizing can unlock a world of creative and commercial possibilities.
What is Machine Embroidery Digitizing?
At its core, machine embroidery digitizing is the process of converting artwork, such as a logo, drawing, or illustration, into a digital file that embroidery machines can read. Unlike simply scanning or uploading an image, digitizing involves mapping out the paths, stitch types, thread colors, and order in which the design will be sewn.
This is done using specialized software like Wilcom, Brother PE-Design, Hatch, or Pulse, which allows digitizers to manually control every aspect of the design’s stitching sequence.
Why Embroidery Digitizing Matters
Machine embroidery has become a staple in industries ranging from fashion and branding to sportswear and uniforms. The key to high-quality embroidery is not just a good machine; it’s the digitized file.
Here’s why proper digitizing is crucial:
- Precision: Digitized designs ensure consistent, repeatable embroidery with clean lines and accurate detailing.
- Speed: Automation speeds up the embroidery process for large production runs.
- Versatility: Works with a variety of fabrics, garments, and thread types.
- Customization: Ideal for monograms, logos, patches, and personalized items.
Key Elements of a Good Digitized Design
To produce flawless embroidery, a digitizer must consider several technical factors:
- Stitch Type Selection: Common types include satin stitches (for borders and letters), fill stitches (for large areas), and run stitches (for outlining and detail).
- Stitch Direction and Pathing: Controls how the machine moves, which affects texture and efficiency.
- Push and Pull Compensation: Adjustments made to account for fabric stretch or shrinkage.
- Underlay Stitches: Foundation stitches that help stabilize the fabric.
- Density and Thread Count: Controls how heavy or light the embroidery appears.
A skilled digitizer will adapt these parameters based on the type of fabric (e.g., cotton, denim, polyester), design complexity, and machine type.
The Digitizing Process: Step-by-Step
- Artwork Preparation: Clean, high-resolution files are prepared, typically in PNG, JPEG, or vector format.
- Import to Digitizing Software: The image is brought into software where the digitizer manually or semi-automatically maps the stitches.
- Assign Stitch Types and Directions: Each area of the design is assigned the appropriate stitch.
- Test and Adjust: The design is previewed and possibly test-stitched to check for errors or inefficiencies.
- Export File: Final file formats (e.g., .DST, .PES, .EXP) are created based on the embroidery machine brand.
Choosing a Digitizing Service
If you’re not ready to digitize in-house, many professional digitizing services offer affordable, quick-turnaround solutions. When choosing a service, consider:
- Experience and Portfolio
- Turnaround Time
- File Format Support
- Customer Reviews
- Pricing and Revisions Policy
Final Thoughts
Machine embroidery digitizing combines artistry with precision technology. Whether you're branding uniforms or embellishing home décor, a well-digitized file is the blueprint for embroidery success. With the right tools and knowledge, or a trusted digitizing partner, you can bring your designs to life in thread, stitch by stitch.
